Setting up a wireless N WiFi repeater is a great way to extend the range of your existing wireless network. The 192.168.10.1 WiFi repeater is one of these repeaters, and it’s easy to set up so you can get better WIFI coverage. By using the 192.168.10.1 WiFi repeater, you can make your wireless network stronger and more reliable, letting you stay connected all over your home or office. In this article, we’ll show you how to set up the 192.168.10.1 WIFI repeater by giving you step-by-step instructions to make sure the process goes smoothly. So, if you’re looking to improve your WiFi coverage, keep reading to learn how to set up the 192.168.10.1 WiFi repeater.
To set up a wireless N WiFi repeater with the IP address of 192.168.10.1, follow these steps:
- Connect the repeater to your computer using an Ethernet cable.
- Turn on the repeater and wait for it to fully boot up.
- Open a web browser on your computer and type in “http://192.168.10.1” in the address bar.
- You should be prompted to enter a username and password. The default login credentials are usually “admin” for the username and “admin” for the password. If these credentials don’t work, consult the user manual for your repeater for the correct login information.
- Once logged in, you should see the repeater’s configuration interface. Look for an option to configure the wireless settings.
- Select the option to scan for available wireless networks.
- Select the network you want to extend and enter the network password if prompted.
- Set up the wireless network name (SSID) and password for the repeater.
- Save the settings and wait for the repeater to reboot.
- Once the repeater has started up again, remove the Ethernet cable and try to connect your device to the new wireless network.
Note: Your wireless N WiFi repeater’s make and model may vary from these instructions. For exact instructions, check your device’s handbook.
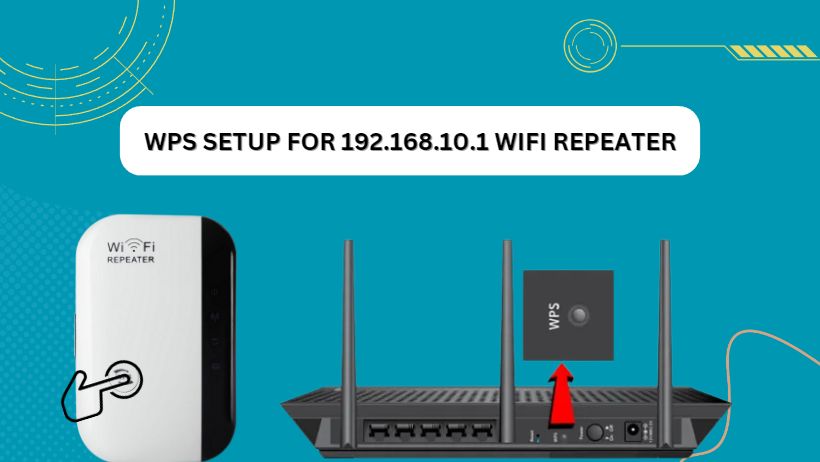
WPS setup for 192.168.10.1 WIFI repeater
Setting up a wireless N WiFi repeater with the IP address 192.168.10.1 via WPS (Wi-Fi Protected Setup) is a quick and easy method that can be done in just a few minutes. Here’s how to do it:

- Ensure that your wireless router supports WPS. Look for the WPS button on your router or check the user manual for instructions.
- Plug in the 192.168.10.1 WiFi repeater and wait for it to fully boot up.
- Press the WPS button on your router, then quickly press the WPS button on the 192.168.10.1 WiFi repeater. The WPS LED on the repeater should start flashing.
- Wait for the WPS LED to stop flashing and remain lit. This indicates that the 192.168.10.1 WiFi repeater has successfully connected to your wireless network.
- Unplug the 192.168.10.1 WiFi repeater and move it to a location where you need to boost your wireless signal.
That’s all! Your 192.168.10.1 WIFI repeater is now configured and ready to use WPS to extend the range of your wireless network. If you run into any problems during the installation, see the user manual or contact the manufacturer for assistance.
192.168.10.1 wireless repeater configuration using the web browser
If you prefer to configure your 192.168.10.1 WiFi repeater via a web browser rather than WPS, follow these steps:
- Plug in the 192.168.10.1 WiFi repeater and wait for it to fully boot up.
- Connect your computer or mobile device to the repeater’s wireless network. The default SSID and password should be printed on the repeater or in the user manual.
- Open a web browser and enter “http://192.168.10.1” in the address bar. Press enter.
- You should see the login page for the 192.168.10.1 WiFi repeater. Enter the default username and password to log in. If you have changed the login credentials before, enter the new ones instead.
- Once logged in, you should see the repeater’s configuration interface. Look for an option to configure the wireless settings.
- Select the option to scan for available wireless networks. Select the network you want to extend and enter the network password if prompted.
- Set up the wireless network name (SSID) and password for the repeater. You can also adjust other settings, such as channel and security mode, if needed.
- Save the settings and wait for the repeater to reboot.
- Once the repeater has rebooted, disconnect from the repeater’s wireless network and connect to the new wireless network you just set up.
All done! Your 192.168.10.1 WIFI repeater is now set up and ready to make your wireless network reach farther. If you have trouble setting up the device, look at the user manual or call the manufacturer for help.
How to reset the wireless N repeater?
If you need to reset your wireless N repeater to the settings it had when it came out of the factory, do the following:
- Look for the reset button on the repeater. It’s usually located on the back or bottom of the device and may be labeled “Reset” or “WPS/Reset.”
- Press and hold the reset button for about 10 seconds. You may need to use a small object like a paperclip or toothpick to press the button if it’s recessed.
- Release the reset button once the LED lights on the repeater start flashing. This indicates that the reset process has begun.
- Wait for the repeater to reboot. This may take a few minutes.
- Once the repeater has fully rebooted, it will go back to the settings it had when it was first made.
When you reset your wireless N repeater, you will lose all of your custom settings, like the network name (SSID), password, and security settings. You will have to set up the repeater from the beginning again. During the reset process, if you have any problems, check the user manual or call the manufacturer for help.
How to Reset 192.168.10.1
Here are the steps to reset a device with the IP address 192.168.10.1:
- Locate the reset button on your device. The reset button is usually a small hole or a button on the back or bottom of the device.
- Using a paperclip or a pin, press and hold down the reset button for about 10–15 seconds.
- Release the reset button and wait for the device to reboot. This may take a few minutes.
- Once the device has been turned back on, it will be reset to its factory default settings. This includes the default username and password, IP address, and other network settings.
When you reset your device to its factory settings, all of your personal settings, like the network name (SSID), password, and security settings, are erased. You must reset the gadget. Consult the user manual or manufacturer for help resetting.
